A more flexible way to load data into OpenEMPI
In the last blog post we looked at the easier way to load data into OpenEMPI that in exchange for simplicity trades-off flexibility. If you don’t want to take the trouble to transform your data into OpenEMPI’s fixed data format or if you are using the Entity edition of OpenEMPI where the record may not represent person demographic data but rather some other entity, such as a provider or a customer, then you need a more flexible approach to load data into your instance.
OpenEMPI provides such an approach called none other than the flexible data loader. We call it the flexible data loader because it lets the user specify how fields from the input file map into record fields. As long as your data is in the form of a delimited file with one record of data per line, you should be able to load the data into your instance without having to perform any additional transformations of the data.
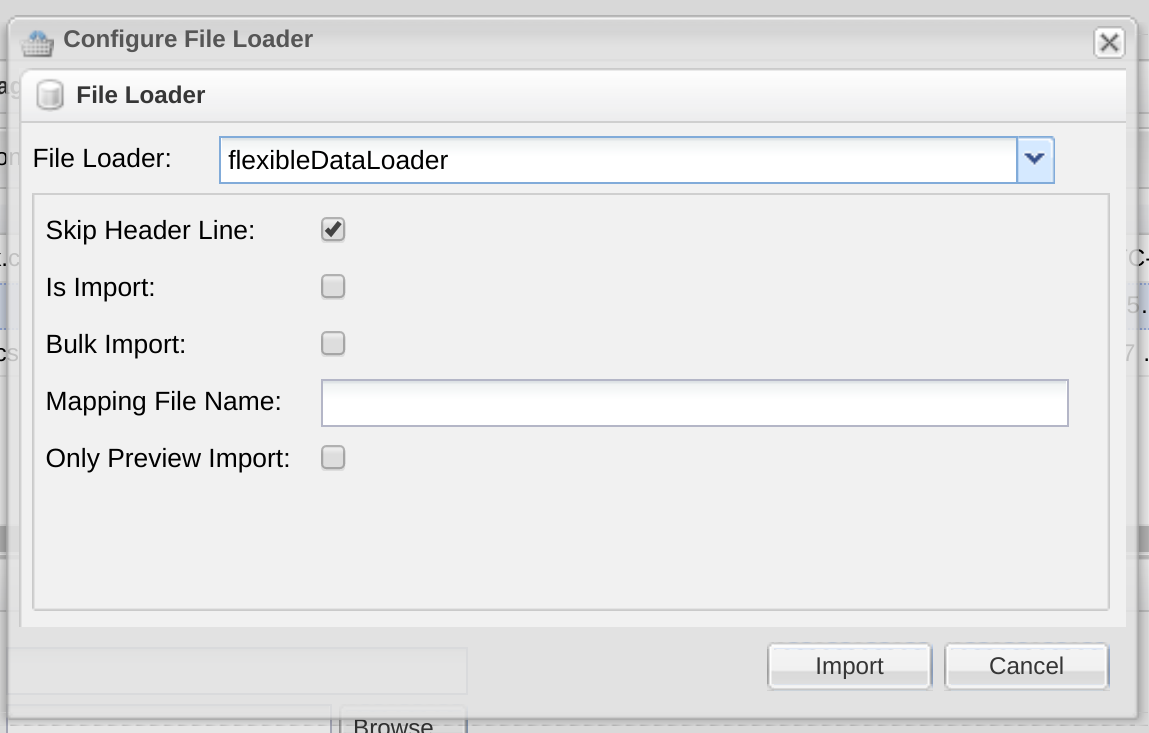
The initial steps for loading a file using the flexible file loader are the same as those you use with the concurrent file loader. You first need to locate the data file on your local machine and then upload it onto the server. When you then press the Import button to load the data onto your instance, you need to select the flexible file loader from the list. The first two check-boxes have the same effect as in the concurrent file loader. The option to perform a bulk import is only available in the Entity edition of OpenEMPI and utilizes an optimization of the underlying repository to allow for the data to be imported very fast. The catch is that you should only use this option when the system is offline from incoming requests. If you perform a bulk import against an instance of OpenEMPI that is in production and servicing incoming requests from external systems, the response time in servicing these external requests will degrade considerably. The last check-box labeled “Only Preview Import”, as you can probably guess from the name, only simulates the import operation but does not actually load any data into the system.
We left the field labeled “Mapping File Name” in the form for last because it will take some time to go through. You use this field to specify the name of the mapping file that tells the loader how to map fields from the data file into fields in the data model of either the person entity in the EMPI edition of OpenEMPI or a specific entity in the Entity edition. The mapping file is an XML file and is expected to reside on the server and specifically in the configuration directory of the instance’s home directory ($OPENEMPI_HOME/conf).
The intricate details of how to create a mapping file and what options are available, are documented in the Administration Console section of the documentation of OpenEMPI. Make sure you look at the version of the documentation that matches the edition of OpenEMPI that you are using (EMPI or Entity). Let’s go through an example here though so that you can get an idea of what the process of creating a mapping file is like.
Here are a file rows from the test file that we will try to import into our system.
rec-36422-org, Jessica, Whillas, 1, Crampton Place, , Parc Falu, 00662, TX, 20020623, 9, 3230872715, 664363886, 5
rec-56480-org, Elly, Vincent, 7, Wilari Place, , Ext Santa Maria, 33314, NY, 19870224, 24, 3225149120, 525133755, 4
rec-25939-org, Samuel, Jeffries, 13, Barrett Street, Aleon, Westland, 47630, TX, 19741018, 37, 6652012291, 189718658, 4
The file we want to import is a comma-separated text file so we start creating the mapping file by defining the header portion of it. Aside from the necessary XML schema attributes, we have specified that the delimiter of the file is a comma and there is not header line in the file that needs to be skipped.
<file-loader-map xsi:schemaLocation="http://configuration.openempi.openhie.org/fileloadermap fileloadermap.xsd" xmlns="http://configuration.openempi.openhie.org/fileloadermap" xmlns:fl="http://configuration.openempi.openhie.org/fileloadermap" xmlns:xsi="http://www.w3.org/2001/XMLSchema-instance" delimeter="," header-first-line="false">
	<fields>
Next we need to define how each field from the data file maps into a field of the data model. The first field is clearly an identifier but it looks like the identifier domain (in some circles it is referred to as the assigning authority) is unspecified and the association between the identifier and its identifier domain is implicit. While mapping the identifier file we can specify in the mapping file the identifier domain associated with this identifier.
<field
			datatype="String"
			is-identifier="true"
			identifier-domain-name="NID"
			namespace-identifier="NID"
			<column-index>1</column-index>
			<field-name>identifier</field-name>
		</field>
The field mapping entry above indicates that the first field (column-index=1) to be imported is an identifier (is-identifier attribute set to true), it should be mapped into the identifier attribute of the data model (field-name is set to identifier) and since it is an identifier, it should be mapped to the identifier domain with name “NID” and namespace-identifier “NID”.
The next two fields in the file are the first name and last name fields so we map them using the following field mapping entries.
<field datatype="String">
	<column-index>2</column-index>
	<field-name>givenName</field-name>
</field>
<field datatype="String">
	<column-index>3</column-index>
	<field-name>familyName</field-name>
</field>
The next field is the street number so in this post we will simply skip over it. After that come the address1 and address2 fields which are then followed by the city, postal code, and state fields. These six field mapping entries are self explanatory and are shown below.
<field is-ignored="true">
	<column-index>4</column-index>
	<field-name/>
</field>
<field datatype="String">
	<column-index>5</column-index>
	<field-name>address1</field-name>
</field>
<field datatype="String">
	<column-index>6</column-index>
	<field-name>address2</field-name>
</field>
<field datatype="String">
	<column-index>7</column-index>
	<field-name>city</field-name>
</field>
<field datatype="String">
	<column-index>8</column-index>
	<field-name>postalCode</field-name>
</field>
The next field is the date of birth which needs to be mapped into the field dateOfBirth which is of date data type. A date can be represented in many different ways and we can give information to the flexible file loader on how to parse the specific date format used in our data file using the date-format-string attribute. The rules for composing the date-format-string are defined in the SimpleDateFormat class of java. In this case the date of birth is a sequence of eight digits consisting of four digits for the year of birth, followed by two digits for the month, and two digits for the date thereby the format string looks is “yyyyMMdd”.
<field datatype="Date" date-format-string="yyyyMMdd">
	<column-index>10</column-index>
	<field-name>dateOfBirth</field-name>
</field>
The next field is the age which we are not going to import since it is already covered through the date of birth. After that we have the phone number which we will import as text and then the social security number, which will we import as an identifier with identifier domain name of SSN. Note that the identifier domain name you select should be already defined in the system before you attempt to upload the file. The last field is a blocking number that is not important so we chose to ignore it.
<field is-ignored="true">
			<column-index>11</column-index>
			<field-name/>
		</field>
		<field datatype="String">
			<column-index>12</column-index>
			<field-name>phoneNumber</field-name>
		</field>
		<field datatype="String" is-identifier="true" identifier-domain-name="SSN">
			<column-index>13</column-index>
			<field-name>identifier</field-name>
		</field>
		<field is-ignored="true">
			<column-index>14</column-index>
			<field-name/>
		</field>
And that pretty much covers the flexible file loader. You should now be able to press the import button and load your data into the system.
<field datatype="String"
	one-to-many="true"
	is-identifier="true"
	delimiter=":">
	<column-index>1</column-index>
	<field-name>identifier</field-name>
	<subfields>
		<field datatype="String">
			<column-index>1</column-index>
			<field-name>identifier</field-name>
		</field>
		<field datatype="String">
			<column-index>2</column-index>
			<field-name>identifierDomainName</field-name>
		</field>
	</subfields>
 </field>