Getting started with OpenEMPI using the Amazon AMI
Although you can find an earlier post about this very topic on our blog, the details of how to start and use the Amazon AMI in order to learn more about OpenEMPI have changed enough that it is time for an update.
AMI is an acronym that stands for Amazon Machine Image. You can think of it as a template that defines the configuration of the operating system and applications that comprise a given environment. The template can then be used to automatically create virtual machine instances from. There are many public AMIs available in the Amazon EC2 cloud such as plain instances that use a specific version of the Windows or Linux operating system or more task specific instances that use a specific operating system along with a collection of applications such as a web server, programming platform and database software. AMIs are identified by
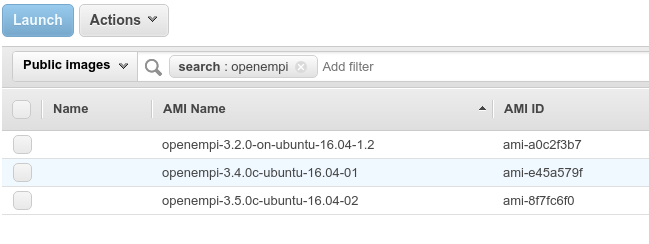
We have made available an Amazon image with OpenEMPI pre-installed along with a reasonable blocking and matching algorithm configuration, and some sample data as well. When starting an EC2 instance you need to provide the AMI template that will be used to initialize the virtual machine. You can look up the AMI using either its name or its AMI ID. The AMI name and AMI ID for the image we have made available are openempi-entity-3.5.0c-ubuntu-16.04.02 and ami-8f7fc6f0. This image is available in the East Coast region of AWS. For this blog I assume that you have an Amazon Web Services (AWS) account and that you have some familiarity specifically with the EC2 service. If that is not the case for you, Amazon provides very good documentation for their web services and you can learn more about it here. Once you select that you want to create a new EC2 instance, the first step involves choosing the AMI that you want to use. You can search for the AMI using the name openempi (no need to type in the long name or cryptic AMI but they are available to you here in this paragraph) and it should come up right away.
The next step involves choosing an instance type. The instance type specifies the hardware configuration of the instance that you want to create. Amazon EC2 offers many instance types to choose from. If you want to just play around with OpenEMPI to see what it offers then a fairly minimal instance type should be sufficient but we recommend an instance that has at least 2GB of memory and preferably 4GB. You can learn more about instance types, their relative performance characteristics and their cost here.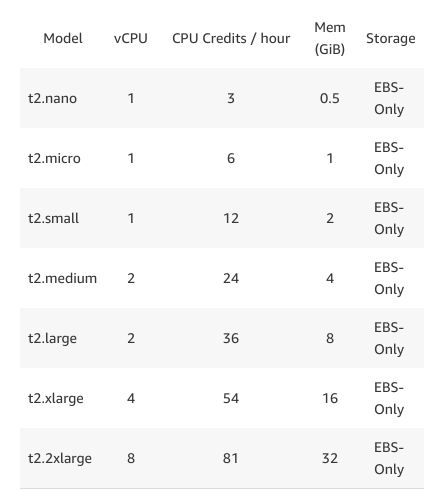
After you select an instance type, you can skip forward to Step 6 to select a security group. You need to create a new security group that provides access to the instance through ssh (so that you can connect to the instance remotely using an SSH client) and you need to also provide TCP access to port 8080, so that you can access the OpenEMPI administrative console at http://
Before launching the instance you will be asked to create a key-pair. A key-pair is a secure authentication mechanism that will allow you to login onto the instance via the SSH protocol without having to provide a password. If you don’t already have a key-pair that you can use, then you will need to create one. Once you launch the instance, it should be ready to go within seconds. From the instance monitoring screen you can select the instance that you created, if you have more than this one running, and in the instance detail window you will be able to see the hostname assigned to the virtual machine. To connect to the instance use the ssh command on a Unix platform or something like putty if you are on a Windows platform. For the hostname of the instance you can use either the value shown next to the Public IP entry or the value shown next to the Public DNS entry.
If you need root access to the instance you need to use the username ubuntu to connect to the instance and use the private key that you created when starting the instance. The user that owns the OpenEMPI software on the image is openempi with a password of openempi so, you can just login using something like the following, once again using either the IP address or the hostname assigned to the instance after the @ symbol.
ssh openempi@ec2-52-5-124-148.compute-1.amazonaws.com
When you connect to the host using ssh, the message of the day on the instance will display some useful information about how to connect to the OpenEMPI installation on your box. We have already loaded some data on the OpenEMPI instance on that box. You can start the OpenEMPI server by going to the root directory of the installation and run the startup.sh command as shown below or in the message of the day instructions.

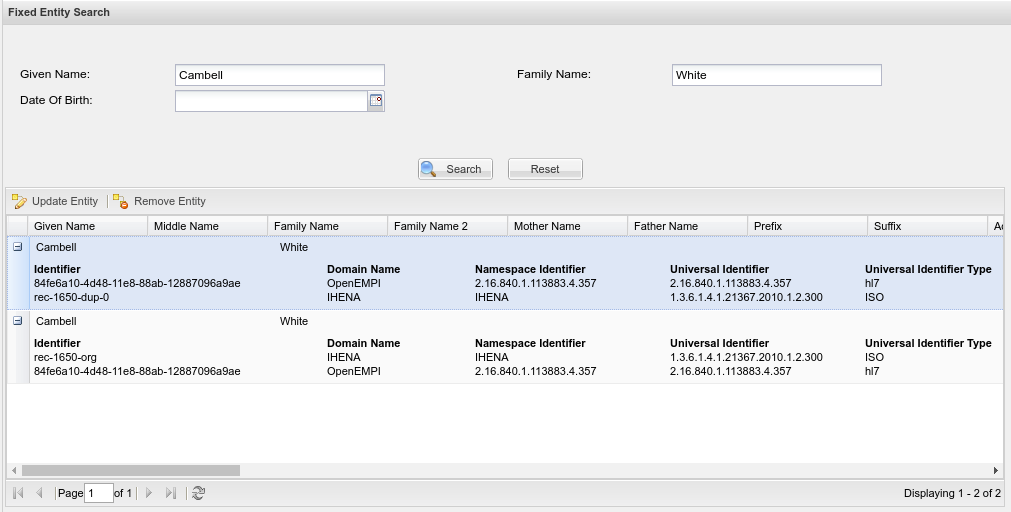
If you prefer to load the instance with your own data then the easiest thing to do is to delete the drop the graph database instance. To do that you first need to make sure that the OpenEMPI server instance is stopped and then remove the directory person-db under /sysnet/openempi/openempi-3.5.0c/data. When you start the OpenEMPI server again, the database will be re-created automatically but there will not be any records in the database any more. You can access the OpenEMPI web administrative application by going to the URL: http://
If you run into any issues with the creation of the instance using this approach, let us know either by email at support@sysnetint.com or by posting a question on the OpenEMPI user forum and we will try to assist you with the process.